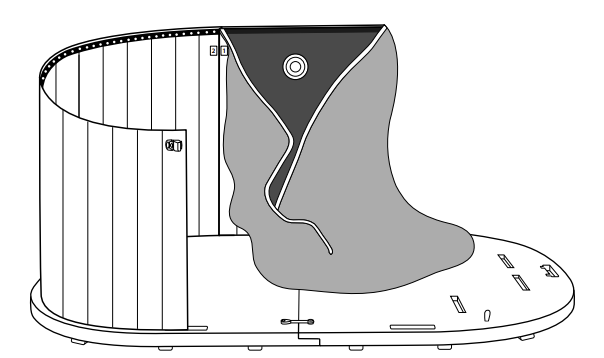
INSTRUCTION PAGE
Follow the step-by-step instructions below to properly and safely assemble your portable hot and ice tub.
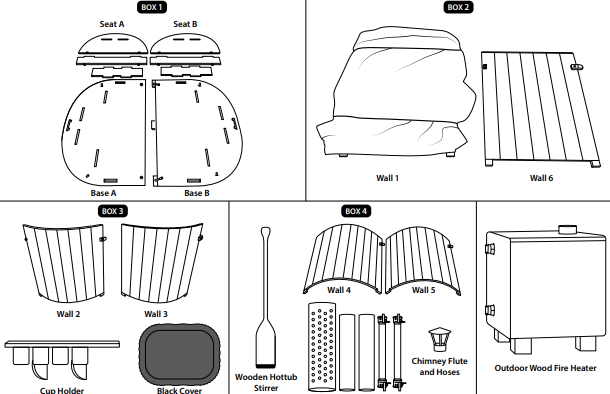
UNPACK THE BOXES
Locate the four wooden boxes and remove all parts, placing them near the intended setup location for your hottub.
Note that the heating unit will not be contained in a box.
STEP 1
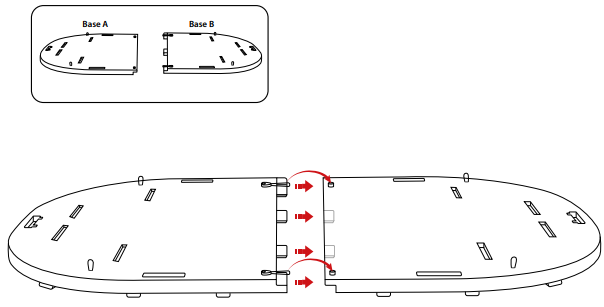
CONNECT THE BASE
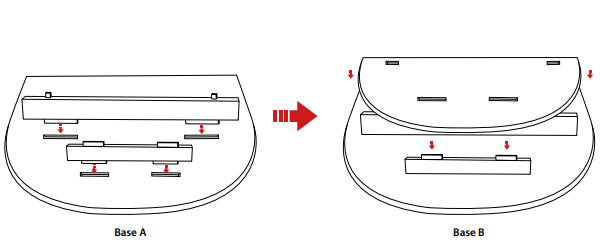
Locate the two oval bases labeled A & B and place them on a flat, even surface where you intend to set up the hottub.
Ensure you slide the base tounge into the grooves and attach the stretch cord loop to the plastic button.
(If required use a protective cloth to cover the garden area)
STEP 2
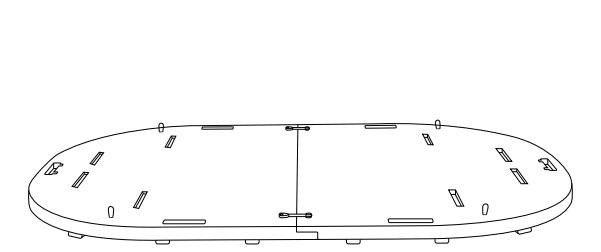
CHECK THE BASE
Ensure the bases are securely connected to each other, and the stretch cords are fastened to the plastic buttons.
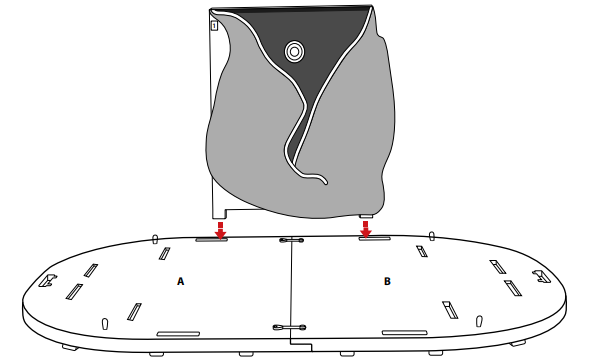
STEP 3
CONNECT WALL 1
Locate wall number one, identifiable by the vinyl attached to it.
Slide wall number one into the groove on the side
of the oval bases labeled A & B
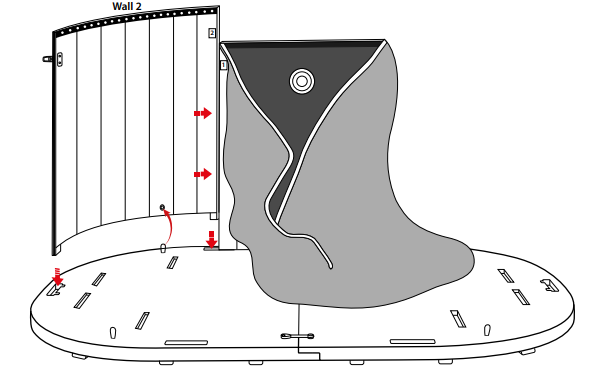
STEP 4
CONNECT WALL 2
Locate wall number two and slide it to the left of wall number one, exactly as shown in the picture.
Make sure to attach the stretch cord loop to the plastic button located at the bottom of wall two.
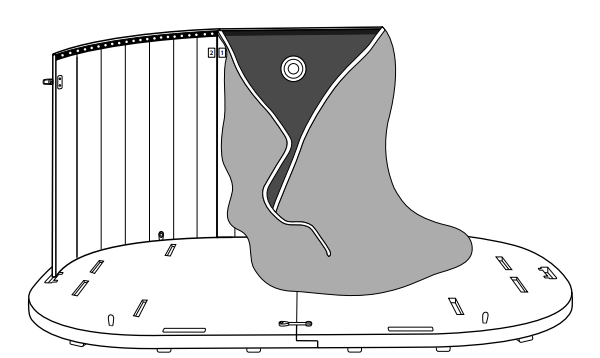
STEP 5
CHECKPOINT
Ensure that wall number one and wall Number two are firmly connected together and that the stretch cords are securely attached to the plastic button
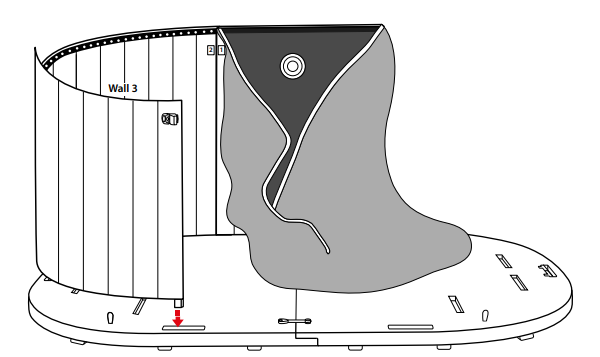
STEP 6
CONNECT WALL 3
Locate wall number three and slide it to the left of wall number two, exactly as shown in the picture.
Attach the stretch cord loop to the plastic button located at the bottom of wall three
STEP 7
CHECKPOINT
Ensure that wall number two and wall Number three are firmly connected together and that the stretch cords are securely attached to the plastic button.
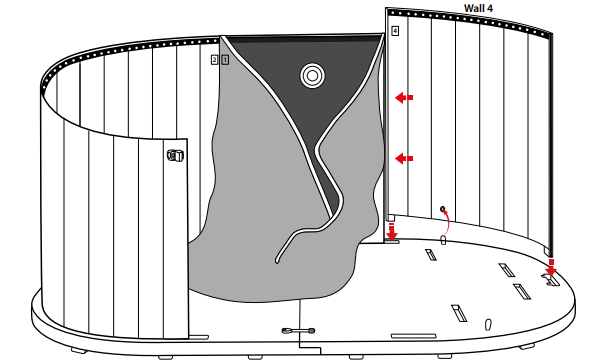
STEP 8
CONNECT WALL 4
Locate wall number four and slide it to the right of wall number one, exactly as shown in the picture.
Make sure to attach the stretch cord loop to the plastic button located at the bottom of wall four.
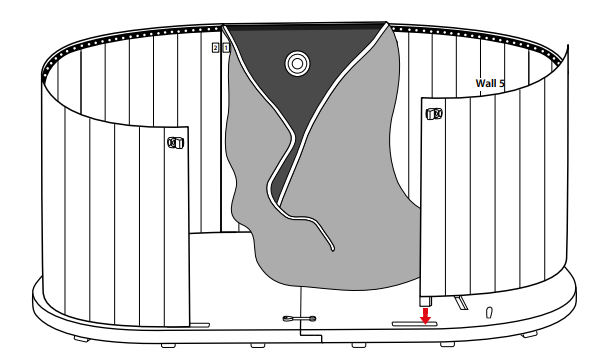
STEP 9
CONNECT WALL 5
Locate wall number five and slide it to the right of wall number four, exactly as shown in the picture.
Make sure to attach the stretch cord loop to the plastic button located at the bottom of wall five.
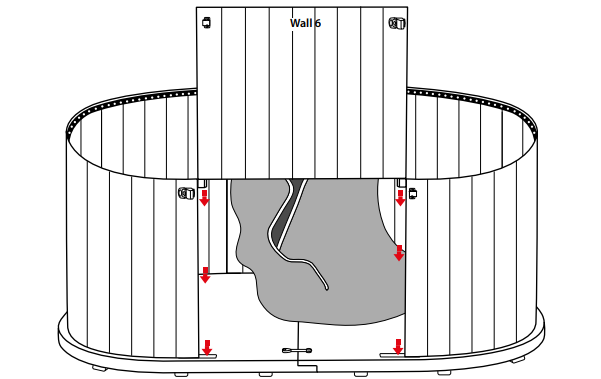
STEP 10
CONNECT WALL 6
Locate wall number six and slide it between walls number three and five.
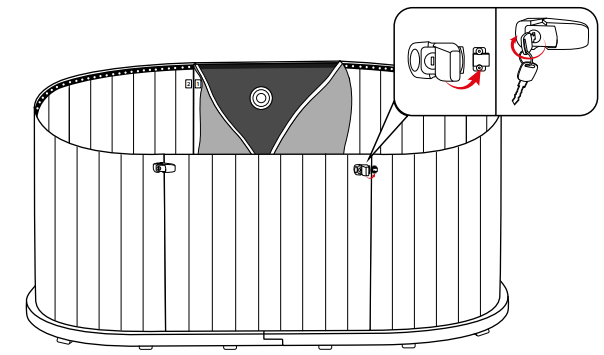
STEP 11
LOCK THE TUB
Ensure all 6 locks located around the hot tub are latched together.
Securely lock each one by inserting the key and turning it clockwise.
It's crucial to double-check that all 6 locks are securely locked.
(Store the Keys in secure environment)
STEP 12
SEAT SET UP
Locate the three pieces required to assemble a seat: one oval piece, one shorter straight piece, and one longer piece.
Attach them to base A.
Ensure that you follow the same steps for assembling the second seat and attach them to base B.
STEP 13
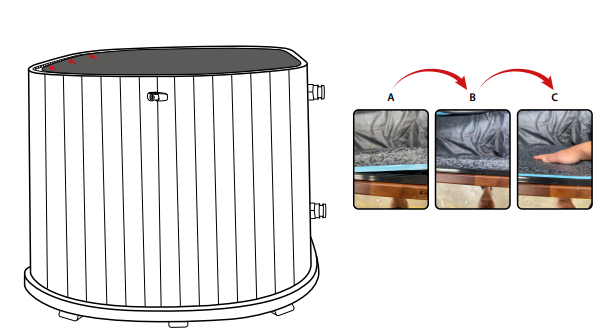
VINYL LAYER
Insert the blue edge of the plastic vinyl inside the groove of the black plastic strip.
Then, using your hand, firmly push down on the vinyl.
Repeat this process until you have fully connected all the vinyl to the black plastic strip (as per image).
STEP 14
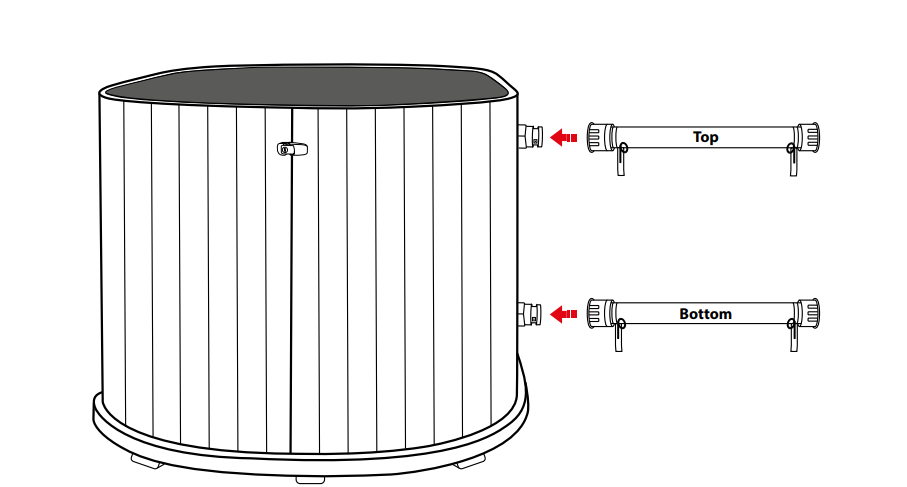
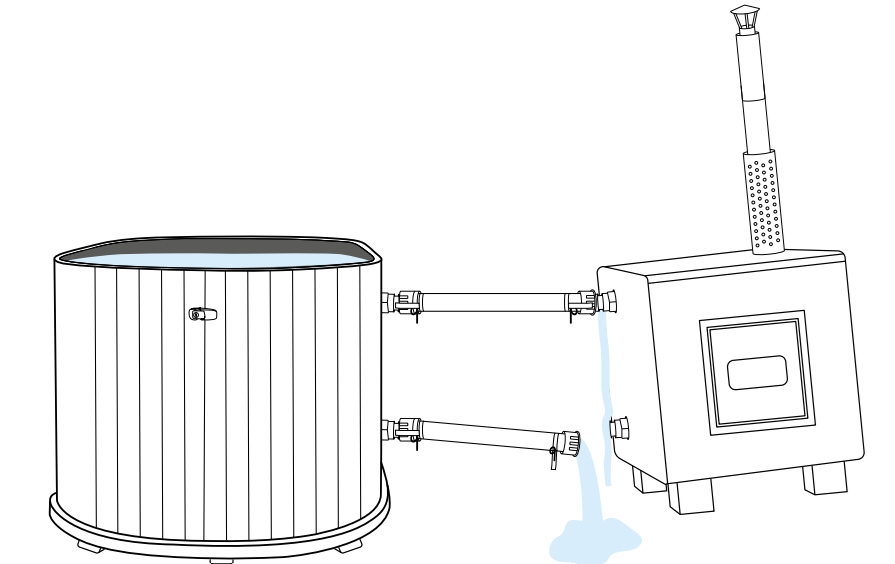
CONNECT HOSES
Locate the hose labeled "top" and insert it into the top opening of the hot tub.
Once inserted, ensure that you push both silver slide levers into the closed position.
Locate the hose labeled "bottom" and insert it into the bottom opening of the hot tub.
Once inserted, ensure that you push both silver slide levers into the closed position.
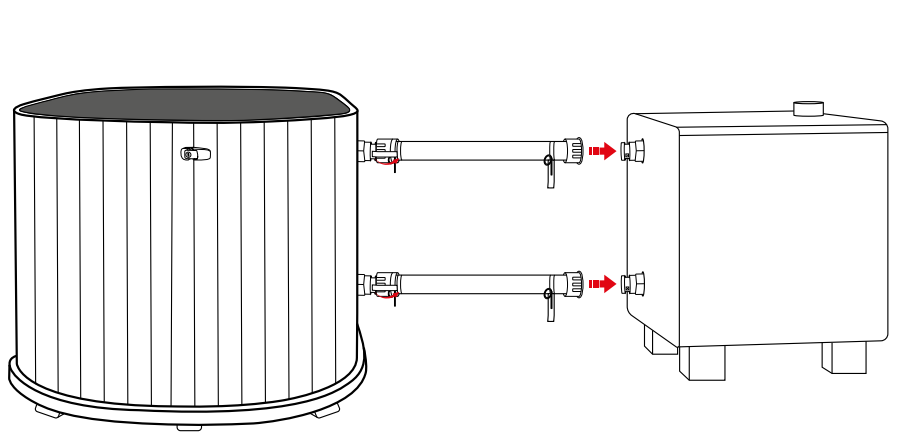
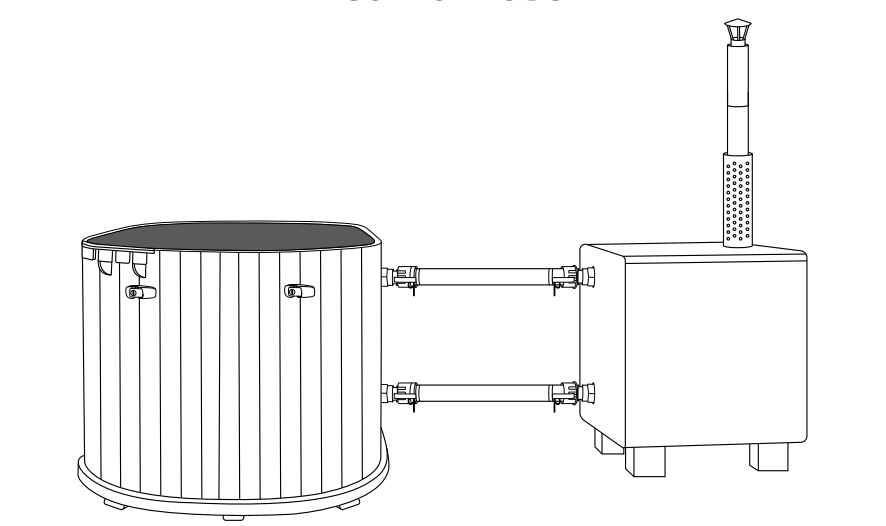
STEP 15
CONNECT THE OVEN
Slide the oven as close as you can to the hose.
Ensure that you connect the top part of the hose to the opening at the top part of the oven.
You will need to do the same for the bottom hose.
Ensure that you push both silver slide levers into the closed position for the top and bottom hoses.
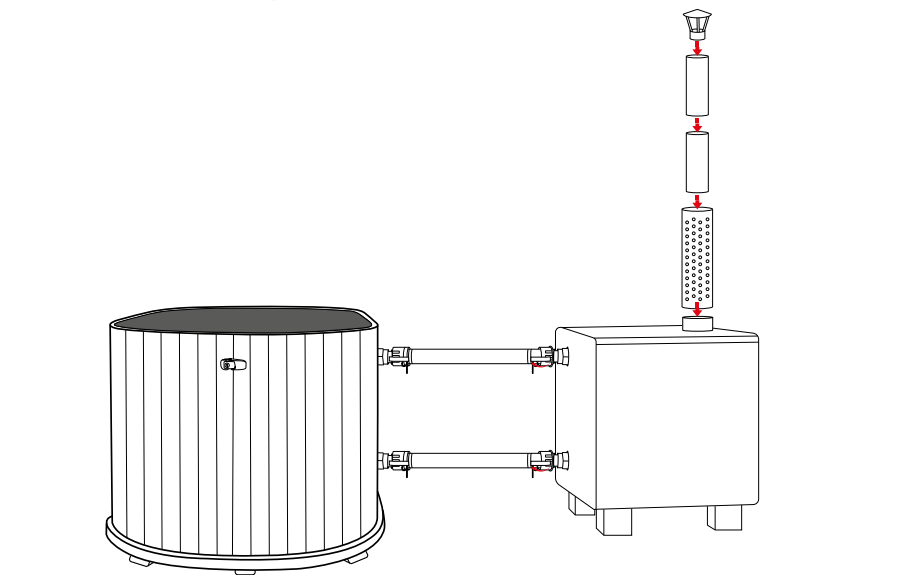
STEP 16
INSERT THE CHIMNEY
Locate the remaining four chimney pieces as per the drawings and slide them in place as per the drawing.
STEP 17
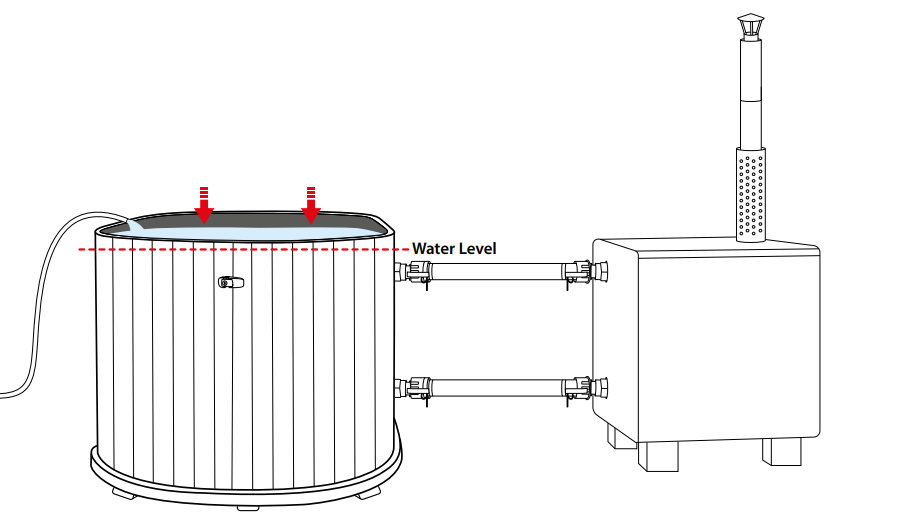
FILL THE WATER
Fill the hot tub with water, ensuring the level is above the top hole located on the inside wall of the tub.
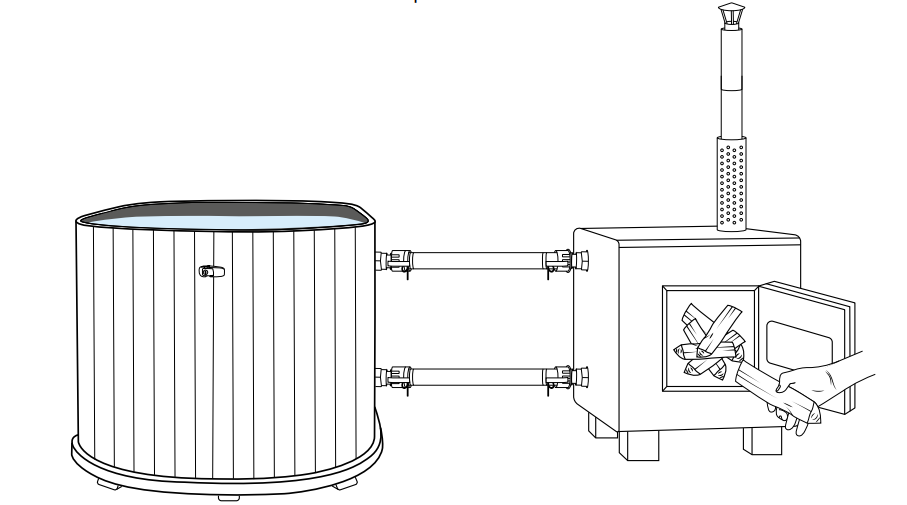
After flling, carefully place ample firewood into the heater and light it. Your hot tub should be heated in less than 1 hour.
Always follow safety guidelines when handling the firewood and lighting the heater.
STEP 18
HEAT THE TUB AND RELAX
Stir the water with the wooden hot tub stirrer every 5 minutes.
Additionally, continue adding wood to the wood-fired heater to maintain and increase the temperate.
STEP 19
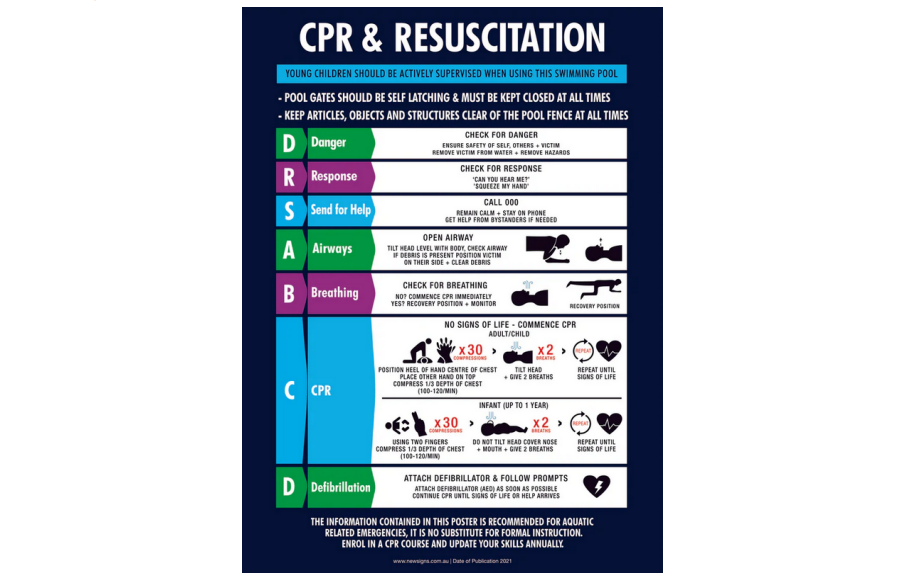
SAFETY RULES
Ensure that you place the CPR & Resuscitation sign within 3 meters of the hot tub.
STEP 20